Build a custom image-to-image app without writing a line of code

Whether you are developing an AI workflow to edit images for your colleagues or a client, or maybe you just want to impress the family at the next gathering, this guide will show you how to quickly make an app to do just that.
In order to work around the hardware problem — most people don’t have the right GPU to run an AI model on their computer — we will use Runpod to access a cloud GPU. We will use ComfyUI to run the workflow, and finally, we will use ViewComfy to create the app’s user interface. If you don’t know what any of this is, don’t worry, we go through all the steps in detail.
Both ComfyUI and ViewComfy are easy to pick up software to design and work with AI workflows. We will focus on a style transfer workflow (img2img), that effectively extracts the style of an image and applies it to another image, in this guide, but you could easily follow the same process with your own Comfy workflows or any that you find online.
Setup Runpod
The first thing to do is to setup Runpod. In addition to being fairly cheap compared to other alternatives, they have templates that we can use with most of what we need already installed.
To get started, you can follow these steps:
- Go to the ComfyUI template on Runpod.
- Click “Deploy” (top right)
- You will then be presented with a range of GPUs you can pick from. I personally always go for the RTX 4090, but you can choose any.
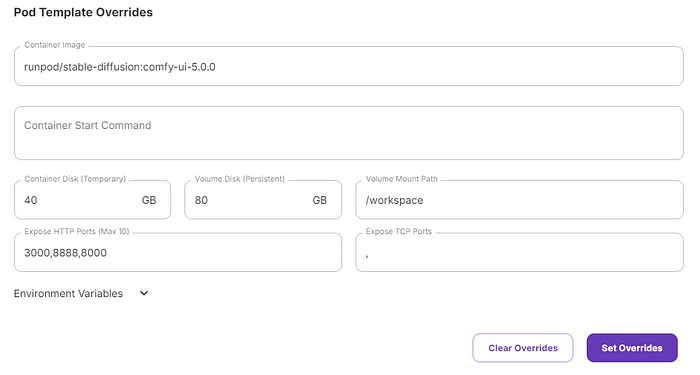
- Click on “edit template”.

- Add 8000 to the list of http ports and click “set overrides” (bottom right). You should end up with three “expose HTTP ports”, like this:

- You can then deploy the template by clicking “deploy on demand” at the bottom of the page. Runpod will start the server where your app will run. This can take up to 5 minutes.
Setup ComfyUI and ViewComfy
ComfyUI and ViewComfy are two flexible open-source software that make it easy to develop and work with AI workflow. ComfyUI is where the img2img workflow will run, and ViewComfy will add a simple user interface to interact with the workflow.
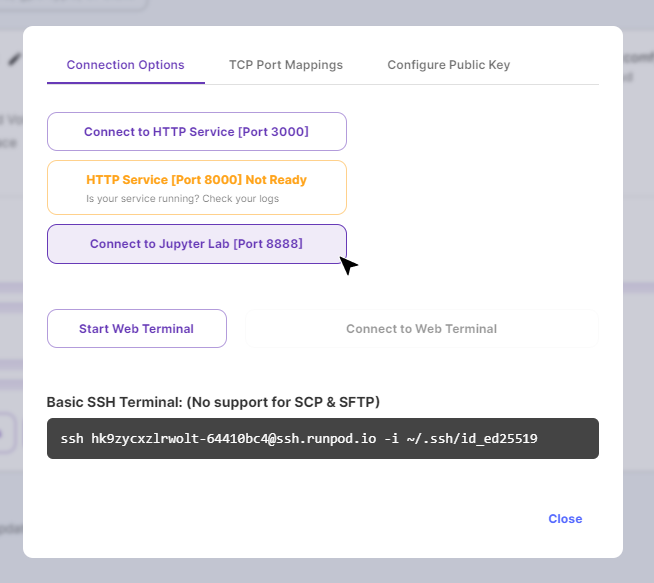
- Once the server is deployed, you can connect to Jupiter Lab by clicking “connect” and selecting port 8888.

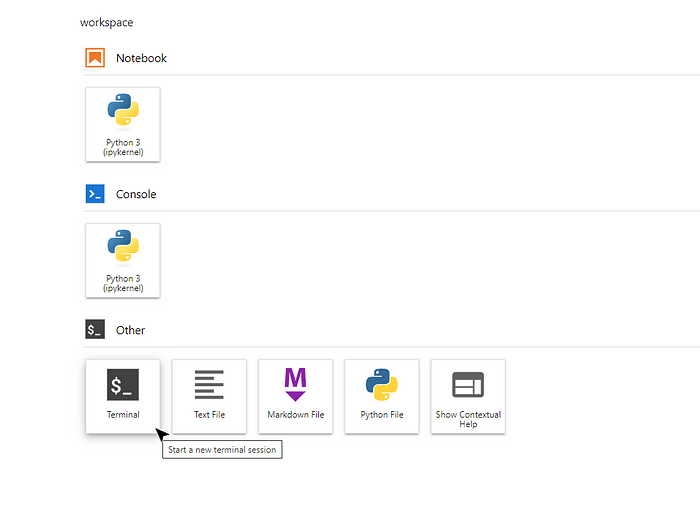
- In Jupiter Lab, open a new terminal.

- In the terminal you just opened, run this code to install ViewComfy and download the AI models you will need for the img2img workflow, again this might take a few minutes:
rm -rf ComfyUI
git clone https://github.com/GBieler/img2img-installer.git
cd /workspace/img2img-installer
sh install.sh
Start the ViewComfy app
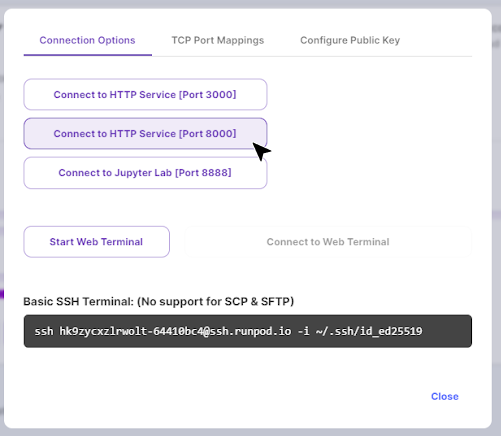
The installation is done when you get a GET printout in the terminal; it will look something like this: “GET / 200 in 139ms”. Once you see it, you are ready to go. To open the ViewComfy app you need to go back to your runpod dashboard and connect to port 8000.

Once ViewComfy is open, you can start using it right away. The app takes in a starting image, “Silhouette”, and applies the style of the “style” image to it. You also have three advanced parameters you can use. The two “control” ones will affect how much of the starting image you will keep, while the “style transfer” one affects the level of style transfer.
If you want to share the app with anyone, you can send them the URL of the window where the app is running. They will be able to use it for as long as your Runpod server is on. Don’t forget to close the server once you are done.
If you are looking to put a comfy workflow in production, or just want to keep it simple and bypass running your own Runpod server, get in touch with the ViewComfy team. We offer a range of cloud and app-building solutions tailored to ComfyUI.